As an Amazon Associate, I earn from qualifying purchases
The Ultimate Guide for doing Christmas Holiday Nails
Christmas Holiday Nails
11/21/20252 min read
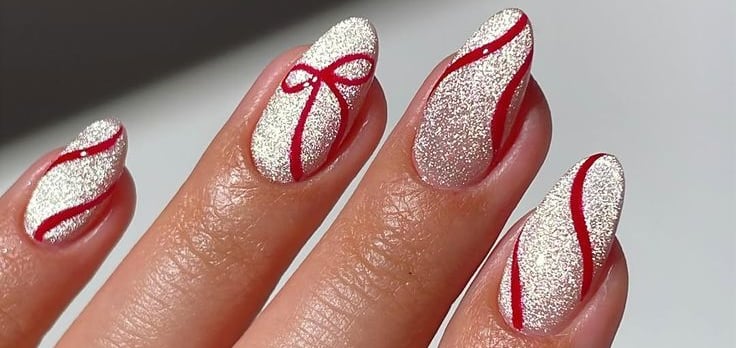
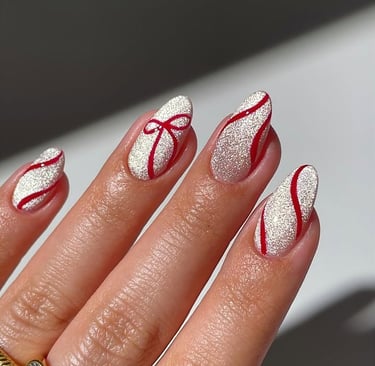
Introduction to Christmas Nail Art
The holiday season is a time of celebration and joy, and what better way to express your festive spirit than with beautiful Christmas nails? Whether you are attending a holiday party, gathering with family, or simply want to showcase your creativity, Christmas nail art provides an excellent opportunity to do so. In this guide, we will explore various techniques, essential tools, and materials you will need to create stunning Christmas-themed nails.
Essential Tools and Materials
To achieve the perfect Christmas nails, having the right tools and materials is crucial. Here is a checklist of items you will require:
Nail Polish: Choose a palette of festive colors such as red, green, white, and gold.
Nail Art Brushes: These are essential for detailed designs, helping you create intricate patterns.
Dotting Tools: Ideal for creating dots and small embellishments, dotting tools can bring your Christmas designs to life.
Nail Tape or Stencils: These tools can help you achieve clean lines and patterns, perfect for nail art.
Top Coat and Base Coat: Protecting your artwork with a top coat will ensure longevity, while a base coat helps the polish adhere better.
Glitter and Sequins: Adding a touch of sparkle can elevate your nail art and make it more festive!
Step-by-Step Christmas Nail Design
Now that you are equipped with the necessary tools, let’s delve into a simple step-by-step process to create Christmas nails:
Prepare Your Nails: Start by cleaning your nails and pushing back the cuticles. File them into your desired shape.
Apply Base Coat: Ensure to apply a base coat as this helps protect your natural nail and provides a smooth canvas for your design.
Choose Your Colors: Opt for the festive shades you’ve gathered, choosing a base color for all nails—red or green works beautifully!
Add Art: Use your nail art brushes or dotting tools to apply detailed designs, such as snowflakes, Christmas trees, or reindeer.
Incorporate Glitter: For an extra festive touch, apply glitter polish or sprinkle some sequins onto your wet topcoat for added flair.
Finish with Top Coat: Seal your design with a top coat, ensuring durability and a beautiful shine.
With these steps, you can create a beautiful set of Christmas nails that will impress friends and family alike. Remember, the key to great nail art is practice and creativity—don’t be afraid to experiment with different designs and combinations!
Conclusion
Creating Christmas nails can be a fun and rewarding experience, allowing you to express your creativity while celebrating the holiday spirit. By gatΩhering the right tools and following the suggested steps, you can achieve stunning results. This holiday season, make your nails a central part of your festive attire, and enjoy the compliments that come your way!